Tuesday, May 31, 2011

Organizing My Travel Documents

Here are a few pics of the folder I created to organize our travel documents for our upcoming cruise.

I took two Vera Bradley folders that someone gave me and placed one inside the other.  I then bound them with my Zutter and created a flap out of blue and brown cardstock and used velcroe as a way of closing the folder.

Here is the flap opened.

Here is the inside.  The right side is actually the front of folder number two so I had to create a pocket out of brown cardstock.

This is the center of the inside folder.  The labels came with the folders I just printed titles on each label by running them through my printer.

This was the fun page.  I had to create four pockets for our passports to fit into.  I also had to create flaps to hold the passports into place.  That would ruin a trip if we lost a passport!  The flaps were made much like the flap to hold the organizer closed. I used matching brads as decorations also.

This is a picture of a flap opened.  The right side of the page is just clear self adhesive pockets that I normally use to slide a gift card into when I make a birthday card etc.  If you look you can see a small blue strip down the right side near the brown flap.  The blue paper was used to cover up the ugly side of the brads used to attach the closing flap.

Here is the back side showing the two brads that I attached the closing flap to

Saturday, March 19, 2011

Bear In The Big Blue House Scrapbook Page

Another Disney World trip page, I am warning you that I will have several posts on this trip.  I really enjoyed creating this page for our pictures from the Bear In The Big Blue House show.  I wanted to create something that resembled the Big Blue House.  To create the look of siding I ran some blue paper through the crinkle tool (I really don't remember what the tool is called).  I just used white paper with a small heart punch to make the shutters and a black pin to draw the lines.  The porch roof is just made from scraps of red and orange papers,  I cut a red strip of paper with slits, the just glued some orange pieces over a few red "slates".

The porch railings are just white strips of paper that I used pop dots to "pop up" and give the page dimension.  I hand drew the door and all of the black lines to match the look of the actual door.  I also had to add a way to "open" the page, so I added small tabs and used stickers to add the word "PULL", so people could figure out how to see the pictures on the page.

Here I am grabbing the PULL tabs to demonstrate how the page opens.

Here is the page opened.  I put the pictures in the "rooms" of a diagram of a house.  On the left side of the page is a smaller diagram which matches the layout of the picture page and I have put my journaling in each "room".

This was such a fun "page" to do!  I really like interactive scrapbook pages.

Sunday, February 13, 2011

Hoops & YoYo Birthday Card

I made this cute card for my twin sister on her 50th Birthday.  What a big milestone for her!  Since she and I both love Hoops and YoYo I knew she would love this card. 

I found this great cut file at Mardenz, you really should check out her website, she has a lot of great cut files and is always happy to create one for you if you ask!

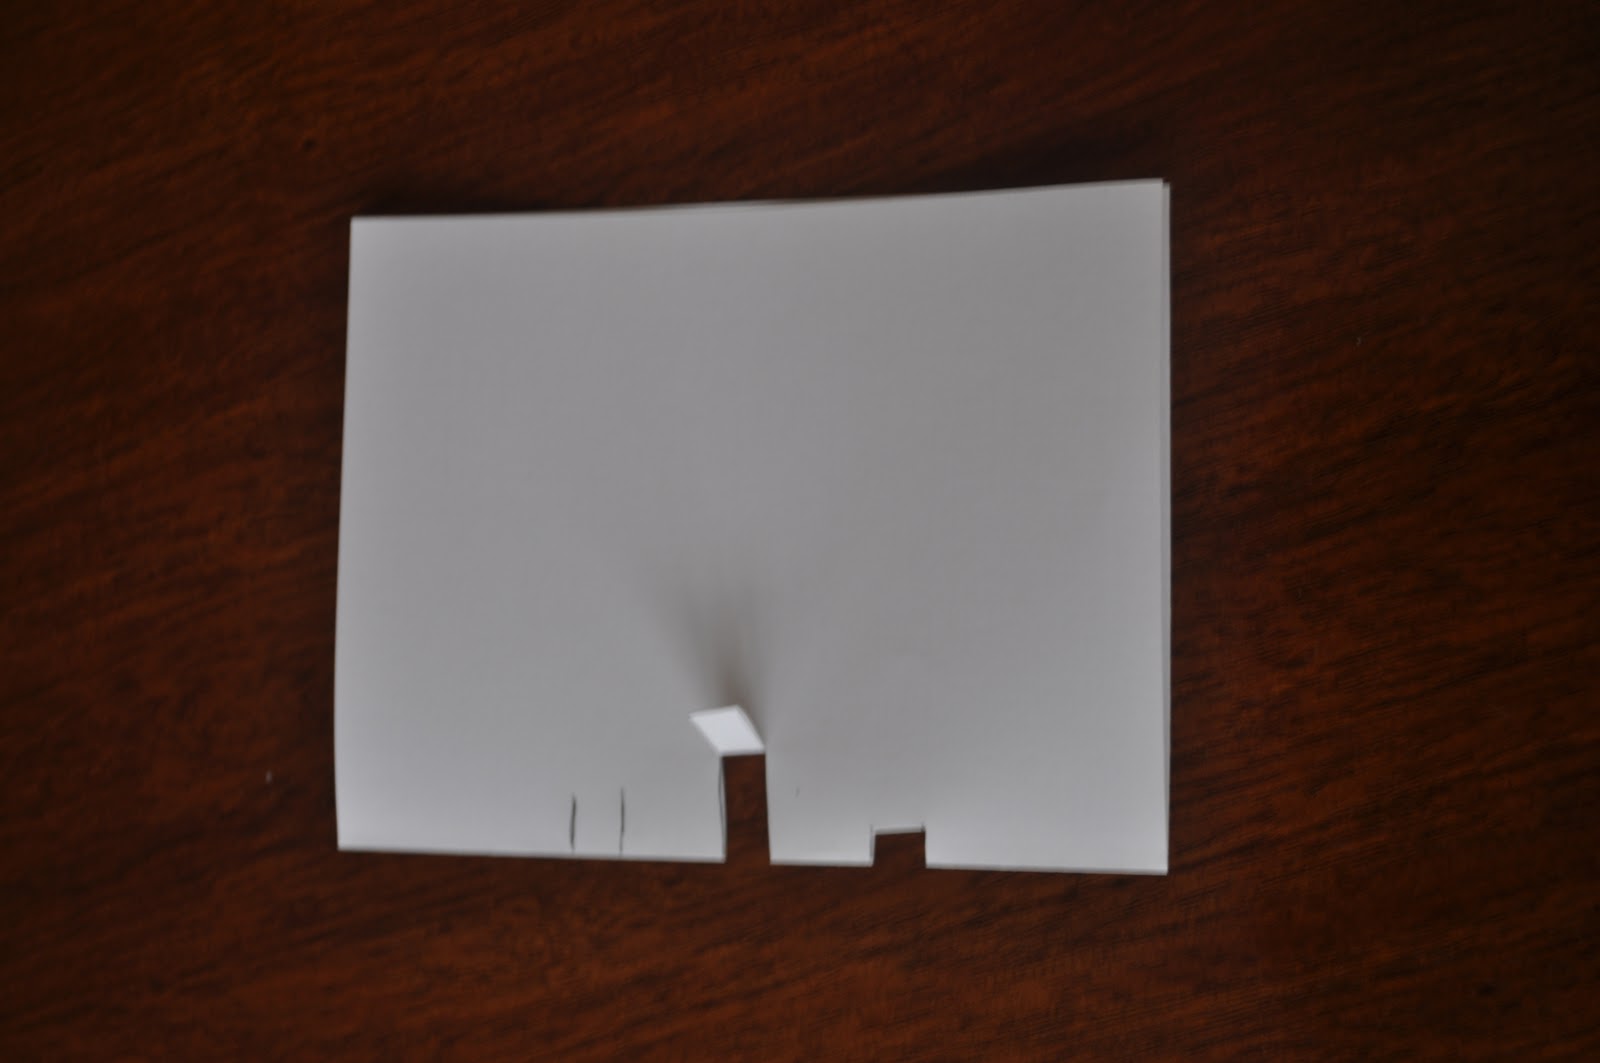
To make Hoops and YoYo jump off the card, I had to cut "steps" into the base card (the orange paper) and mounted Hoops and YoYo onto separate steps.  I hope the next picture helps explain this.
If you look at the picture below, you will see an example of three separate "steps".  The lines on the left are where I would cut to make a "step".  The middle step has been cut and bent down, bending it down makes it easier to fold the "step" to the inside of the card, the "step" on the right has been bent to the inside of the card.  If you notice each "step" is a different length.  The deeper the cut is, the more the item you mount to it will pop from the card.  The flip side of that is the item you mount to the longer step has to be shorter to fit into the folded card.
After you fold the cuts to the inside of the card it should look similar to the picture below. You can see why I call them steps.  

You just mount your items to the front of each step.  Make sure that the items you mount to the steps will fit inside the folded card or inside the envelope you have for it.  I first mount the item with repositional tape then fold the card shut to make sure it fits. 

The cake and ballons were cut using the Stretch Your Imagination Cricut cartridge, each balloon was mounted using pop dots.  The "50th" was just mounted onto scrap paper and I hand cut the shape, then mounted that onto the middle step.  I used glitter paper to make the silver icing for the cake and plate, the flames for the candles were made with orange stickles.

Tuesday, February 1, 2011

My Valentines Treat Boxes


Today my office is closed due to an ice storm that hit the Indianapolis area, so I am catching up and making two posts!

Here are some treat boxes that I made for my son to give to his teachers for Valentines Day.  I wish I could take credit for creating these adorable boxes but I got them from Denise at Paper Pastimes.  Here is a link to the video she made showing how she makes them. The cut file is on her blog a few posts below the video.

Through the "window" you can see that I have filled them with treats.


Go check out Denise's blog, she has MANY more great boxes and projects.  You could spend hours going through the fabulous projects she has posted.


Magic Pumpkin Page

Here is another post on my Disney World trip scrapbook.  This trip was such a big deal, I decided that I would splurge and hire a limosine to take us to the airport.  The picture that my husband took of me and the kids in front of the limosine at the airport had to be done on a special page, so I decided to create a Magic Pumpkin and place us inside of the pumpkin.  I could not find a cut file that suited me for the magic pumpkin, so I had to create one by hand.  This is what I came up with!


It doesn't show up well, but the darker green lines are stickles, and if you look closely, you can see that I used gold stickles to draw the lines of the pumpkin.  The moon and stars are glitter stickers that I bought in a packet several years ago.

I hope you enjoy it.

Monday, January 10, 2011

Stanley's Great Big Book of Everything

On our trip to Disney World we saw the Stanley stage show.  I decided to put the pictures from this show in a "book" that resembled the book that Stanley uses to get answers to his questions on his show.  This is what I came up with.  On the show, his book only has the A, B & C tabs, so I only included these three tabs on my book.  I created the Stanley doll  with my Sizzix die, but the head on the Sizzix doll was not large enough to create a Stanley, so I just cut that by hand going by pictures of Stanley.  I drew his hair with a pen.   The clothes for Stanley came from the Sizzix die cuts also.  If you have the Everyday Paper Doll cricut cart you would be able to create the same doll, but the head will have to be created by hand because Stanley has to have a much larger head than the one provided on the cart, where else whould he put all those brains??

This is the inside of the "book" with the pictures of the show.  I wanted it to look like Stanley's real book so I cut paper shapes to resemble pieces of tape to make the pictures appear as if they were taped into the book, just like Stanley does.

Here I am lifting the tab to get to the next page.

This is the last page of the book. I think it turned out kind of cute!

Thanks for stopping by.  I hope to be able to post more frequently now since the busy Christmas season is over.

Saturday, November 20, 2010

Steaming Cup of Tea

Here is the cup I came up with for my Tea Pot.  I am not completely happy with it.  It looks lopsided to me, but I made it for my mom and Moms love anything their kids make for them don't they???  Even if their kids are parents themselves!

I just made the pattern for the cup by hand and used small strips of paper left over from my tea pot to put a pattern on the cup.  The steam was from the cricut cartridge Joys of the Season.  I also used my glitter pen to add some sparkle to the "tea" and "steam".

Let me know what you think.