It is really hard to tell from this picture, but the "water" is made from toothpaste! I know what you are thinking, and no, that is not a typo, I really made it from toothpaste. I put gel toothpaste (it has to be gel toothpaste, the regular toothpaste does not look like water) in a ziplock bag and put it in the shadowbox. To be honest with you, I have no idea how this will hold up over time. I can say that I created this at least 3 years ago and it is still fine. The picture I used was not the original, just incase the ziplock bag began to leak, so I took a copy of a picture from the cruise and turned it into a black and white copy. The ship was just a sticker I purchase awhile ago, the clouds are from cotton balls and the moon is a circle that I cut from scrap yellow paper and inked to make it look like a cloudy night moon.
Sunday, July 31, 2011
Cruise Book Cover
For our 10th Wedding Anniversay my DH and I got to go on a cruise (without our children!). I made a scrapbook of our trip, here is a picture of the outside of the album. I was able to find a scrapbook with a shadow box on the front. Unfortunately the picture does not demonstrate the dimensions you get by using a shadow box to create this.
Sunday, July 24, 2011
Travel Packet
I have a great friend who recently went on a cruise, so for her birthday I made a book for her to organize all of her travel documents. This is the front of the book, I used cereal boxes to make the pages and covered them with paper from a beach themed packet that I purchased at a Big Lots store a long time ago.
I wanted to make the book a size that would easily fit into a purse or would be easy to store in a small carry on.
When you open the book you will see the section where you can store airline tickets, your passport books and a small section to store a passport card which is an optional item to purchase when you order a passport and is the size of a credit card.
On the last page I created a section to store note cards where you can jot down things you did or saw for each day. This is great for scrapbookers who want to make sure and journal the trip correctly when they are ready to scrapbook the event. I even made special color coordinated paper to journal on.
I bound it using my Bind-it-All machine. The project was much easier to complete by having a color coordinated packet of paper instead of having to pick out matching papers from my supply.
I wanted to make the book a size that would easily fit into a purse or would be easy to store in a small carry on.
On the last page I created a section to store note cards where you can jot down things you did or saw for each day. This is great for scrapbookers who want to make sure and journal the trip correctly when they are ready to scrapbook the event. I even made special color coordinated paper to journal on.
I hope you enjoyed it and thanks for stopping by!
Sunday, July 17, 2011
Victorian Birthday Card
This is a card I made for someone who loves purple and who lives in an old Victorian style house. I used the Heritage cartridge from provo craft and chose the hat design. I cut it at 3 1/2 on black cardstock. The background paper was cut at 5 1/4 X 4, the paper that I used was double sided, so I cut 1 1/2 inches off of the bottom and turned it over to have a matching design on the bottom portion which I stamped Happy Birthday on. I wrapped the ribbon around it before placing it on the card.
I mounted the hat and added flowers to it using glitter. I also added glitter to the ribbon of the hat. I did not mount the hat on pop dots because I wanted the glitter flowers to come off of the hat onto the background paper.
I hope you enjoyed this, let me know if you have any questions,
Sunday, July 10, 2011
Hello Kitty Birthday Card
This is a birthday card I made using my Hello Kitty cartridge from Provo Craft. I will no longer buy any Cricut cartridges because I dislike what Provo Craft has done to the makers of Make the Cut and Sure Cuts A Lot, but I will use the ones I currently have as long as possible.
I cut Kitty at 3 inches, but that size does make some pieces very small and hard to work with. I actually got frustrated with the small pieces for the center of the two flowers and just used glitter instead of the small dots that were part of the cut.
The letters were cut at 1 and 1/2 on pink paper with pink polka dots. I do like the font because it was easy to work with at such a small size. The background for the letters was cut using the shadow feature of the same size, I just used brown ink pad to ink around the edges.
The card itself was made using and 81/2 X 11 inch size of white card stock which I cut in half to make two pieces 8 1/2 X 5 1/2. I scored that in the middle length ways at 4 1/4 and folded it in half. The piece of green background paper was cut at 4 inches by 5 1/4. I attached a ribbon to it prior to placing on the white folded cardstock paper, then placed my Hello Kitty and Happy Birthday sentiment on it. I did use pop dots on Kitty to make her pop off the card.
One thing I have found out while making cards is that it takes the most time coming up with the design, the paper colors and ribbon color to use for each card, so when I decide on a combination of these items for a card it is very little extra effort to make two or four of the same design and put aside for another birthday.
Tuesday, May 31, 2011
Organizing My Travel Documents
Here are a few pics of the folder I created to organize our travel documents for our upcoming cruise.
I took two Vera Bradley folders that someone gave me and placed one inside the other. I then bound them with my Zutter and created a flap out of blue and brown cardstock and used velcroe as a way of closing the folder.
Here is the flap opened.
Here is the inside. The right side is actually the front of folder number two so I had to create a pocket out of brown cardstock.
This is the center of the inside folder. The labels came with the folders I just printed titles on each label by running them through my printer.
This was the fun page. I had to create four pockets for our passports to fit into. I also had to create flaps to hold the passports into place. That would ruin a trip if we lost a passport! The flaps were made much like the flap to hold the organizer closed. I used matching brads as decorations also.
This is a picture of a flap opened. The right side of the page is just clear self adhesive pockets that I normally use to slide a gift card into when I make a birthday card etc. If you look you can see a small blue strip down the right side near the brown flap. The blue paper was used to cover up the ugly side of the brads used to attach the closing flap.
Here is the back side showing the two brads that I attached the closing flap to
Saturday, March 19, 2011
Bear In The Big Blue House Scrapbook Page
Another Disney World trip page, I am warning you that I will have several posts on this trip. I really enjoyed creating this page for our pictures from the Bear In The Big Blue House show. I wanted to create something that resembled the Big Blue House. To create the look of siding I ran some blue paper through the crinkle tool (I really don't remember what the tool is called). I just used white paper with a small heart punch to make the shutters and a black pin to draw the lines. The porch roof is just made from scraps of red and orange papers, I cut a red strip of paper with slits, the just glued some orange pieces over a few red "slates".
The porch railings are just white strips of paper that I used pop dots to "pop up" and give the page dimension. I hand drew the door and all of the black lines to match the look of the actual door. I also had to add a way to "open" the page, so I added small tabs and used stickers to add the word "PULL", so people could figure out how to see the pictures on the page.
Here is the page opened. I put the pictures in the "rooms" of a diagram of a house. On the left side of the page is a smaller diagram which matches the layout of the picture page and I have put my journaling in each "room".
This was such a fun "page" to do! I really like interactive scrapbook pages.
Here is the page opened. I put the pictures in the "rooms" of a diagram of a house. On the left side of the page is a smaller diagram which matches the layout of the picture page and I have put my journaling in each "room".
This was such a fun "page" to do! I really like interactive scrapbook pages.
Sunday, February 13, 2011
Hoops & YoYo Birthday Card
I made this cute card for my twin sister on her 50th Birthday. What a big milestone for her! Since she and I both love Hoops and YoYo I knew she would love this card.
I found this great cut file at Mardenz, you really should check out her website, she has a lot of great cut files and is always happy to create one for you if you ask!
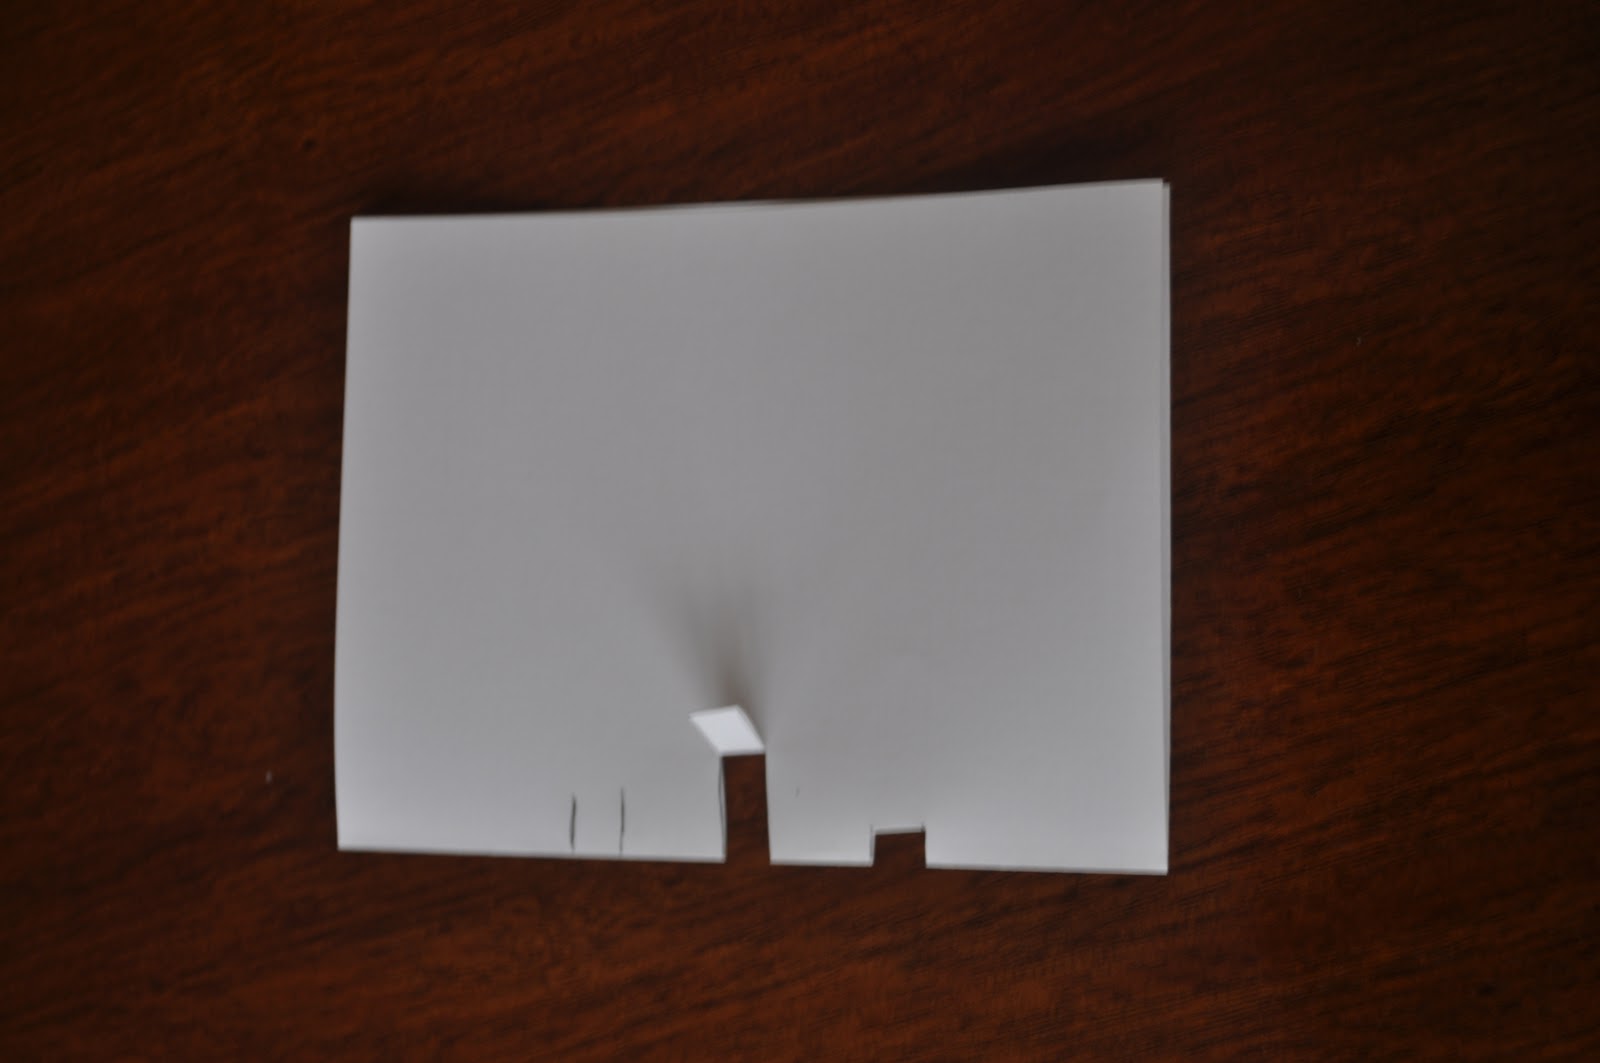
To make Hoops and YoYo jump off the card, I had to cut "steps" into the base card (the orange paper) and mounted Hoops and YoYo onto separate steps. I hope the next picture helps explain this.
If you look at the picture below, you will see an example of three separate "steps". The lines on the left are where I would cut to make a "step". The middle step has been cut and bent down, bending it down makes it easier to fold the "step" to the inside of the card, the "step" on the right has been bent to the inside of the card. If you notice each "step" is a different length. The deeper the cut is, the more the item you mount to it will pop from the card. The flip side of that is the item you mount to the longer step has to be shorter to fit into the folded card.
After you fold the cuts to the inside of the card it should look similar to the picture below. You can see why I call them steps.
You just mount your items to the front of each step. Make sure that the items you mount to the steps will fit inside the folded card or inside the envelope you have for it. I first mount the item with repositional tape then fold the card shut to make sure it fits.
The cake and ballons were cut using the Stretch Your Imagination Cricut cartridge, each balloon was mounted using pop dots. The "50th" was just mounted onto scrap paper and I hand cut the shape, then mounted that onto the middle step. I used glitter paper to make the silver icing for the cake and plate, the flames for the candles were made with orange stickles.
Subscribe to:
Posts (Atom)