Sunday, February 13, 2011

Hoops & YoYo Birthday Card

I made this cute card for my twin sister on her 50th Birthday.  What a big milestone for her!  Since she and I both love Hoops and YoYo I knew she would love this card. 

I found this great cut file at Mardenz, you really should check out her website, she has a lot of great cut files and is always happy to create one for you if you ask!

To make Hoops and YoYo jump off the card, I had to cut "steps" into the base card (the orange paper) and mounted Hoops and YoYo onto separate steps.  I hope the next picture helps explain this.
If you look at the picture below, you will see an example of three separate "steps".  The lines on the left are where I would cut to make a "step".  The middle step has been cut and bent down, bending it down makes it easier to fold the "step" to the inside of the card, the "step" on the right has been bent to the inside of the card.  If you notice each "step" is a different length.  The deeper the cut is, the more the item you mount to it will pop from the card.  The flip side of that is the item you mount to the longer step has to be shorter to fit into the folded card.
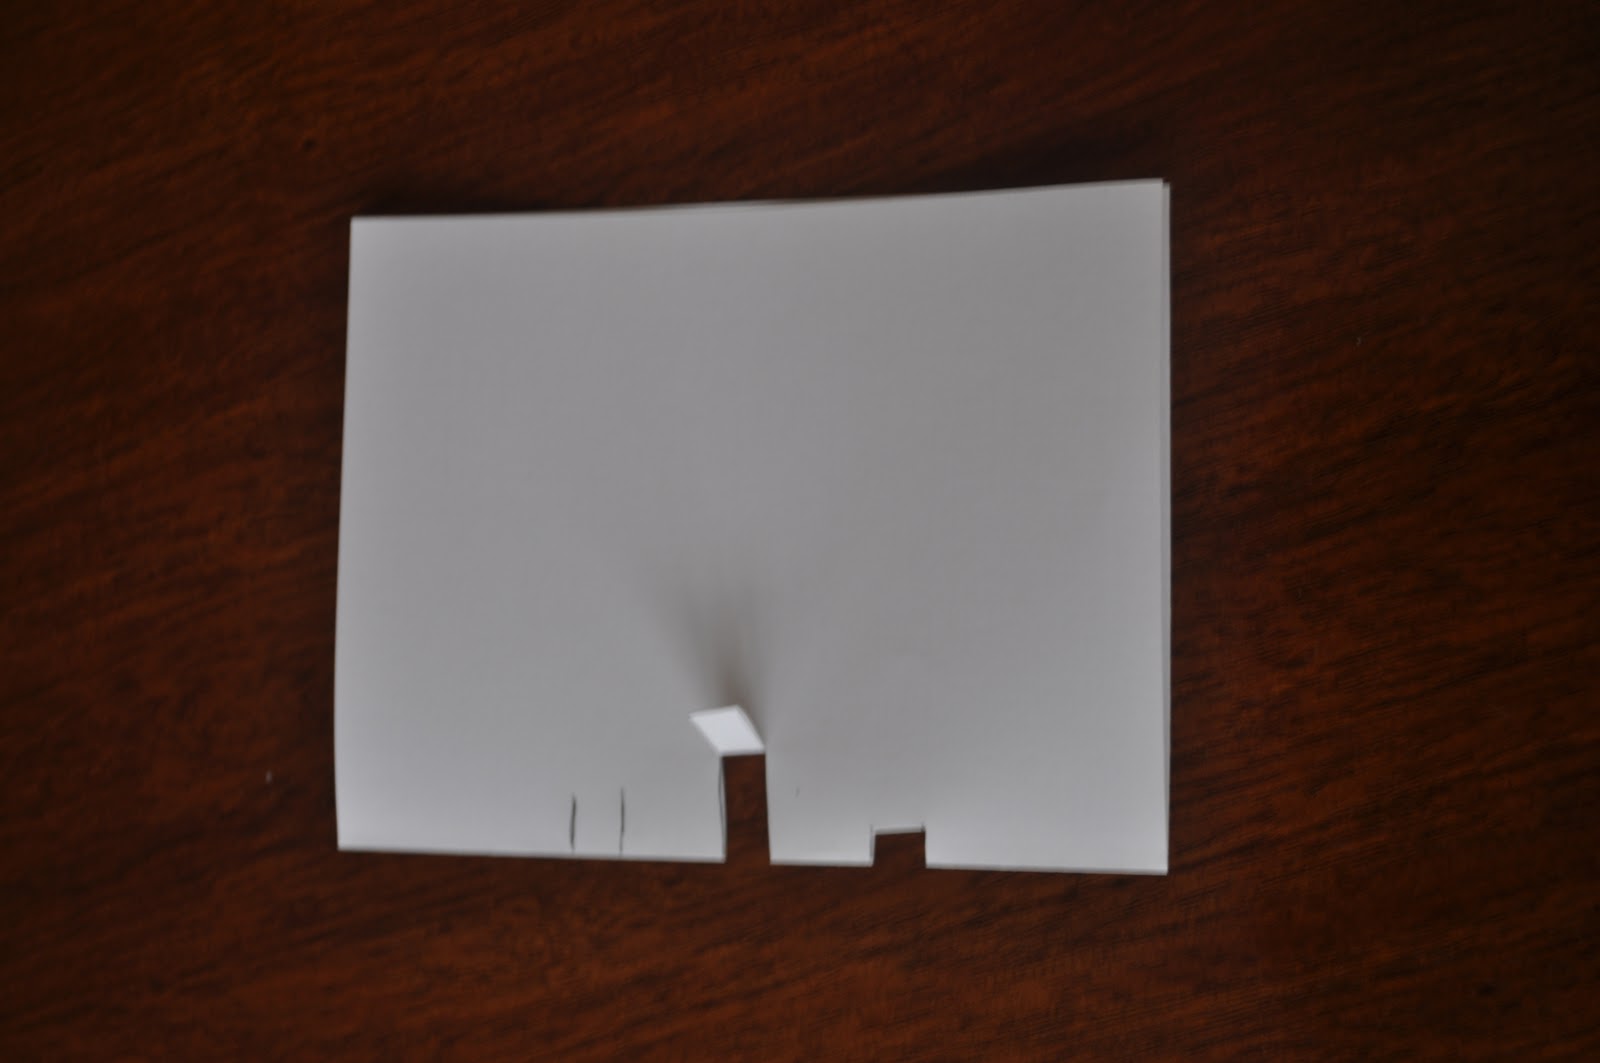
After you fold the cuts to the inside of the card it should look similar to the picture below. You can see why I call them steps.  

You just mount your items to the front of each step.  Make sure that the items you mount to the steps will fit inside the folded card or inside the envelope you have for it.  I first mount the item with repositional tape then fold the card shut to make sure it fits. 

The cake and ballons were cut using the Stretch Your Imagination Cricut cartridge, each balloon was mounted using pop dots.  The "50th" was just mounted onto scrap paper and I hand cut the shape, then mounted that onto the middle step.  I used glitter paper to make the silver icing for the cake and plate, the flames for the candles were made with orange stickles.

Tuesday, February 1, 2011

My Valentines Treat Boxes


Today my office is closed due to an ice storm that hit the Indianapolis area, so I am catching up and making two posts!

Here are some treat boxes that I made for my son to give to his teachers for Valentines Day.  I wish I could take credit for creating these adorable boxes but I got them from Denise at Paper Pastimes.  Here is a link to the video she made showing how she makes them. The cut file is on her blog a few posts below the video.

Through the "window" you can see that I have filled them with treats.


Go check out Denise's blog, she has MANY more great boxes and projects.  You could spend hours going through the fabulous projects she has posted.


Magic Pumpkin Page

Here is another post on my Disney World trip scrapbook.  This trip was such a big deal, I decided that I would splurge and hire a limosine to take us to the airport.  The picture that my husband took of me and the kids in front of the limosine at the airport had to be done on a special page, so I decided to create a Magic Pumpkin and place us inside of the pumpkin.  I could not find a cut file that suited me for the magic pumpkin, so I had to create one by hand.  This is what I came up with!


It doesn't show up well, but the darker green lines are stickles, and if you look closely, you can see that I used gold stickles to draw the lines of the pumpkin.  The moon and stars are glitter stickers that I bought in a packet several years ago.

I hope you enjoy it.